Make Your Business Card with Python and Pillow Library (PIL Folk)
Learn how to design eye-catching business cards using Python and the Pillow library. Follow step-by-step instructions to transform your designs into professional business cards with ease.


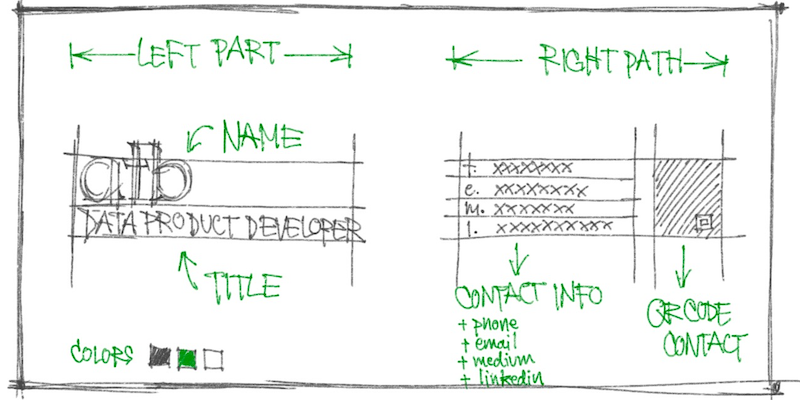
In this article, let's explore how to transform this image draft into a stylish business card using Python and the Pillow library, also known as PIL Folk (Python Image Library).
- Prerequisites
- Setting Up Python
- Preparing Fonts
- Drafting the Business Card
- Adding Contents
- Enhancing the Design
- Saving the Business Card
- Final Code
- Conclusion
Prerequisites
- Install Python version 3 or higher.
- Install Pillow (PIL Fork) library.
pip install PillowSetting Up Python
First, create a Python file (e.g., card.py). Then, import necessary modules for business card creation and prepare variables with the card information.
from PIL import Image, ImageDraw, ImageFont


name = "atb"
title = "DATA PRODUCT DEVELOPER"
phone = "+668 xxxx 1234"
email = "[email protected]"
medium_url = "medium.com/atbb"
linkedin_url = "linkedin.com/in/athibet"ImageUsed for creating, opening, and managing images.ImageDrawUtilized to add shapes, text, and other graphic elements to images.ImageFontEmployed for managing fonts.
Preparing Fonts
Choose fonts according to your preference. I used the Lexend font from Google Fonts and downloaded it to a folder named ./fonts/ next to the card.py file.
Next, define typography using ImageFont.truetype(...).
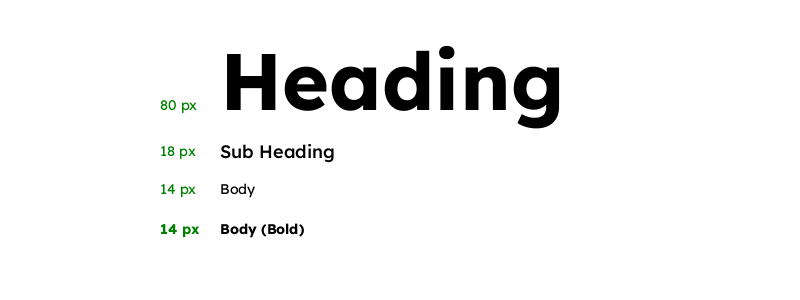
font_heading = ImageFont.truetype("fonts/Lexend-Bold.ttf", 80)
font_sub_heading = ImageFont.truetype("fonts/Lexend-Medium.ttf", 18)
font_body = ImageFont.truetype("fonts/Lexend-Regular.ttf", 14)
font_body_bold = ImageFont.truetype("fonts/Lexend-Bold.ttf", 14)
Drafting the Business Card
Create the card structure using Image.new(...). Set the business card to be black and 800 pixels width and 400 pixels height.
card_width = 800
card_height = 400
card = Image.new("RGB", (card_width, card_height), "black")
Look at our business card image with card.show() and you'll see the initial business card like this.

Adding Contents
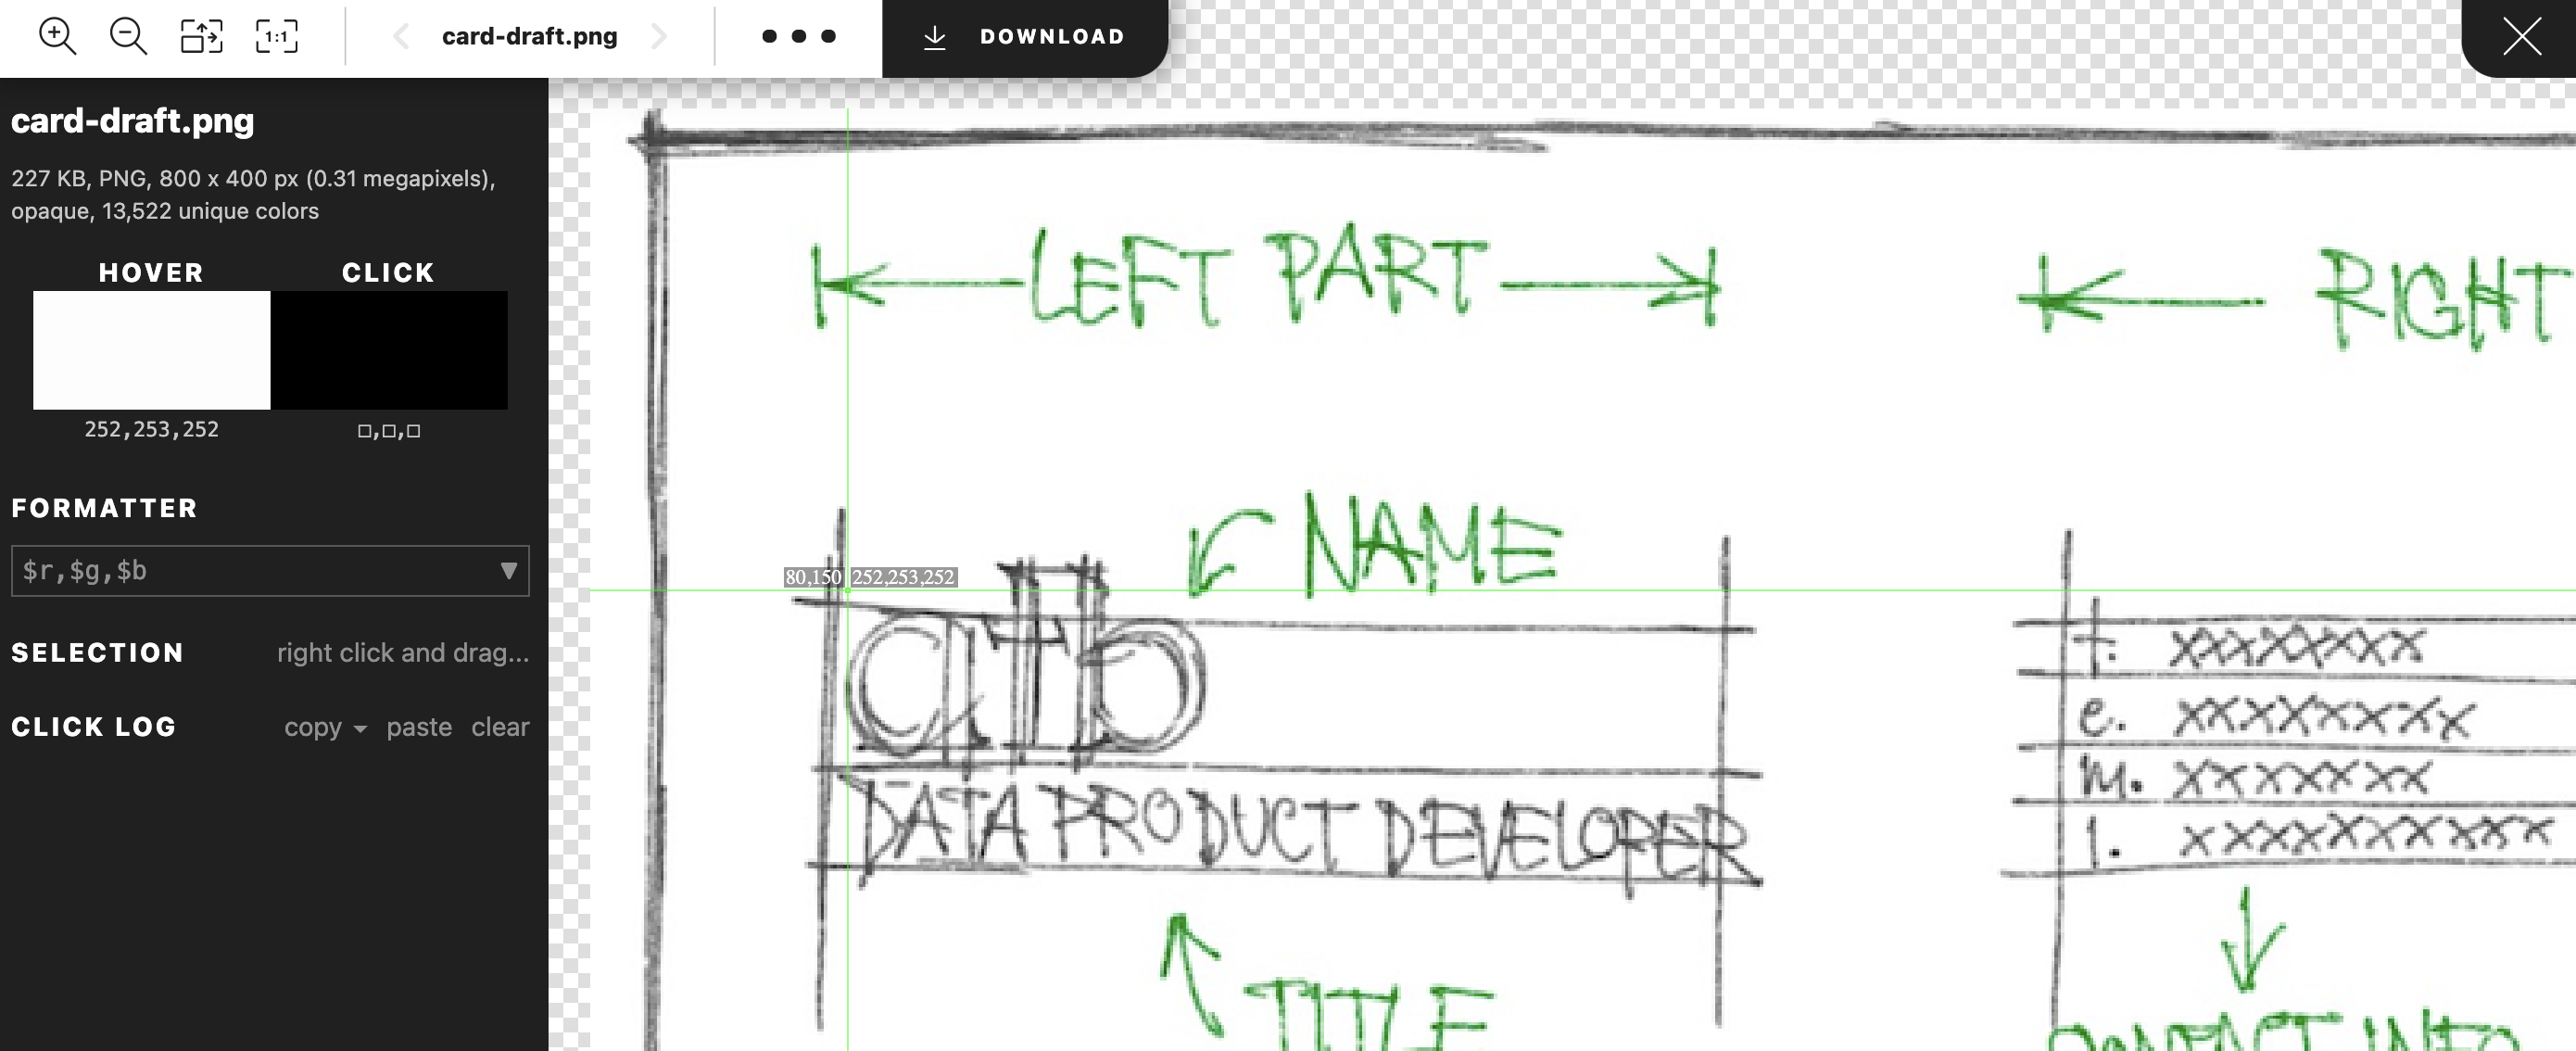
Once the card layout is finalized, incorporate the name and title on the left side. When drawing text, it's essential to specify pixel positions on the (x, y) axis clearly, such as (60, 130). You can use Pix Spy to estimate pixel positions roughly.
After determining the positions, prepare to draw them onto the image using ImageDraw.Draw(…). Begin by drawing text with .text(...), specifying dimensions (x, y), text content, text color (fill), and font.
draw = ImageDraw.Draw(card)

# Add left contents
draw.text((60, 130), name, fill="white", font=font_heading)
draw.text((60, 220), title, fill="white", font=font_sub_heading)
Next, add contact information such as phone, email, medium_url, and linkedin_url on the right side.
# Add right contents -[1]- `text`
draw.text((454, 160), f"t. {phone}", fill="white", font=font_body)
draw.text((454, 180), f"e. {email}", fill="white", font=font_body)
draw.text((454, 200), f"m. {medium_url}", fill="white", font=font_body)
draw.text((454, 220), f"l. {linkedin_url}", fill="white", font=font_body)
For all four lines of contact information, you can use draw.text_multiline(…) instead of draw.text(). but remember to add \n in the text to specify line breaks.
# Add right contents -[1]- `text`
# draw.text((454, 160), f"t. {phone}", fill="white", font=font_body)
# draw.text((454, 180), f"e. {email}", fill="white", font=font_body)
# draw.text((454, 200), f"m. {medium_url}", fill="white", font=font_body)
# draw.text((454, 220), f"l. {linkedin_url}", fill="white", font=font_body)

# Add right contents -[2]- `multiline_text`
draw.multiline_text(
    (454, 160),
    f"t. {phone}\ne. {email}\nm. {medium_url}\nl. {linkedin_url}",
    fill="white",
    font=font_body,
    spacing=6,
)
Finally, Include the contact QR code (I generated it from The QR Code Generator website). Open the QR code image using Image.open(...) and paste it onto the business card using .paste(...) (QR code is white). If the QR code is too large, you can resize it appropriately using .resize(...).
qr_code = Image.open("qr-code.png").resize((80, 80))
card.paste(qr_code, (660, 160), qr_code)
With these steps completed, you'll have a fully detailed business card.
Enhancing the Design
While the business card is ready for use, consider refining it further to enhance its visual appeal. For example, try adding small lines in front of the title to draw attention to the left side.
draw.text((60, 130), name, fill="white", font=font_heading)
draw.line((64, 224, 64, 237), fill="green", width=4) # Add a green line
draw.text((72, 220), title, fill="white", font=font_sub_heading) # Adjust the position
Experiment with aligning the contact information to the right side for better organization.
# Add right contents -[1]- `text`
# draw.text((454, 160), f"t. {phone}", fill="white", font=font_body)
# draw.text((454, 180), f"e. {email}", fill="white", font=font_body)
# draw.text((454, 200), f"m. {medium_url}", fill="white", font=font_body)
# draw.text((454, 220), f"l. {linkedin_url}", fill="white", font=font_body)

# Add right contents -[2]- `multiline_text`
# draw.multiline_text(
#     (454, 160),
#     f"t. {phone}\ne. {email}\nm. {medium_url}\nl. {linkedin_url}",
#     fill="white",
#     font=font_body,
#     spacing=6,
# )

# Add right contents -[3]- `multiline_text` + alignment
contact_prepends = ["t.", "e.",  "m.", "l."]
draw.multiline_text(
    (454, 160),
    "\n".join(contact_prepends),
    fill="green",
    font=font_body_bold,
    spacing=6,
)
contact_texts = [phone, email, medium_url, linkedin_url]
draw.multiline_text(
    (476, 160),
    "\n".join(contact_texts),
    fill="white",
    font=font_body,
    spacing=6,
)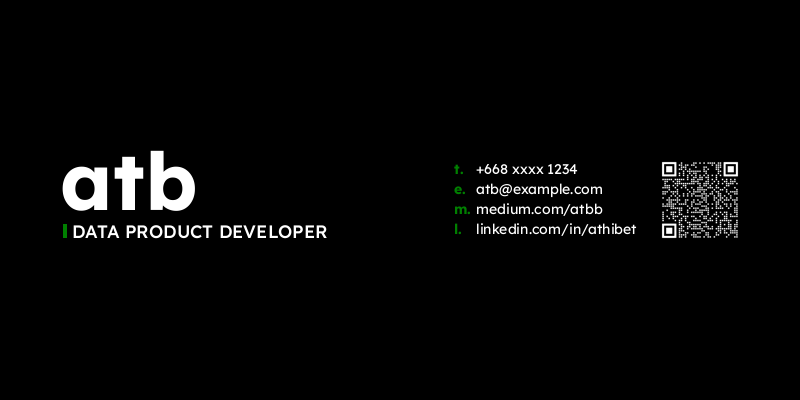
After implementing these adjustments, your business card will have an improved design and organization.
Saving the Business Card
Once the card is ready, it's time to save it as an image file.
card.save("card.png")You can choose various image formats like PNG, JPEG, or PDF as per your requirement.
Final Code
from PIL import Image, ImageDraw, ImageFont


# Define the contact information
name = "atb"
title = "DATA PRODUCT DEVELOPER"
phone = "+668 xxxx 1234"
email = "[email protected]"
medium_url = "medium.com/atbb"
linkedin_url = "linkedin.com/in/athibet"

# Define fonts
font_heading = ImageFont.truetype("fonts/Lexend-Bold.ttf", 80)
font_sub_heading = ImageFont.truetype("fonts/Lexend-Medium.ttf", 18)
font_body = ImageFont.truetype("fonts/Lexend-Regular.ttf", 14)
font_body_bold = ImageFont.truetype("fonts/Lexend-Bold.ttf", 14)

# Create a blank business card
card_width = 800
card_height = 400
card = Image.new("RGB", (card_width, card_height), "black")

# Create a drawing context
draw = ImageDraw.Draw(card)

# Add left contents
draw.text((60, 130), name, fill="white", font=font_heading)
draw.line((64, 224, 64, 237), fill="green", width=4)
draw.text((72, 220), title, fill="white", font=font_sub_heading)

# Add right contents
contact_prepends = ["t.", "e.",  "m.", "l."]
draw.multiline_text(
    (454, 160),
    "\n".join(contact_prepends),
    fill="green",
    font=font_body_bold,
    spacing=6,
)
contact_texts = [phone, email, medium_url, linkedin_url]
draw.multiline_text(
    (476, 160),
    "\n".join(contact_texts),
    fill="white",
    font=font_body,
    spacing=6,
)

# Paste QR Code
qr_code = Image.open("qr-code.png").resize((80, 80))
card.paste(qr_code, (660, 160), qr_code)

# Save the business card
card.save("card.png") atbee
atbeeConclusion
This article has been a journey to create a business card using Python and the Pillow library, starting from structuring, preparing font typography, drawing text, placing images, drawing lines, and finally, saving a usable business card.
Pillow is an interesting and easy-to-use tool, specifically developed for image processing. There are many more capabilities not covered in this article. If interested, further exploration is encouraged.


